Better AI videos start with a clear idea, a suitable reference and a plan for how each shot will work in the final edit.
You have an idea for a short café video: a barista places a cup by the window, sunlight falls across the table and steam rises from the coffee. An ai video generator such as Dreamina can help turn a written description or an authorised image into a moving draft. The result may still need refinement: the hand might move unnaturally, the cup could change shape, or the shot may not fit the platform where you want to share it.
Improving the result involves more than writing a longer prompt. Choosing the right starting material, planning a simple sequence, controlling motion and editing the finished clips all make a difference. This guide follows the café idea from the initial brief to a short, ready-to-review video.
Before opening a tool, decide what the video needs to do. A clip that introduces a café’s atmosphere has a different job from a product demonstration or a fictional story. The former might need an inviting setting and gentle movement; the latter may require a clear sequence of actions or accurate product details.
For our fictional café, the goal is a short social video that gives viewers a sense of a quiet morning. The intended audience is people who might enjoy the café’s atmosphere. The video will show a table by the window, a cup being placed down and a close view of the finished scene.
Write a simple brief:
Purpose: Introduce the feeling of a calm morning at the café.
Key message: A quiet moment can be part of the day’s routine.
Visual subject: A ceramic coffee cup, wooden table and window light.
Placement: A vertical social video, subject to the destination’s current requirements.
Next step: Viewers can learn more about the café through the accompanying post.
This is a fictional example. If making a video for a real café, use real and authorised information for the location, offer and any claims. The brief helps you decide which clips belong in the video and which are attractive but unrelated.
A single clip does not have to tell the whole story. Breaking the idea into a few shots can make the action easier to control and give you more flexibility in the edit.
For the café example, start with three shots:
Establishing shot: A wider view of a quiet table beside a window introduces the setting.
Action shot: A barista places a cup on the table. The viewer sees the central action clearly.
Detail shot: Steam rises from the resting cup in soft morning light. This provides a calm closing image.
Each shot has one main job. If the hand movement is difficult to generate, you can still use the establishing and detail shots while revising or replacing the action shot. You can also use real footage of the cup being placed down if the exact action matters.
Sketch the sequence as three sentences or simple boxes. Note what appears on screen, what the viewer should notice and whether there will be a headline or narration. This small storyboard makes it easier to see gaps before spending time creating variations.
A written description is useful when the scene exists mainly in your imagination. You can describe a fictional café, the light, the table and the action without needing a photograph of that exact scene.
An image reference can be helpful when you already have a visual direction. An authorised café photograph might establish the table and window; an approved product image can show the real cup or packaging. Where the selected workflow supports image input, use a clear reference and specify what should move.
The two approaches can also work together. You might explore the wider café setting from a text brief, then use an authorised image to guide a close-up. Check that the resulting shots feel related before adding them to the same edit.
Consider what a still image actually shows. If the cup is already resting on the table, asking the model to show it being placed there may require it to invent an earlier moment. A gentler action—such as steam rising or light shifting—may fit that starting image better. If the placement action is essential, plan a separate shot.
Only upload and publish references you are authorised to use. For a real product or location, a reference helps guide the scene but does not guarantee that every detail remains accurate.
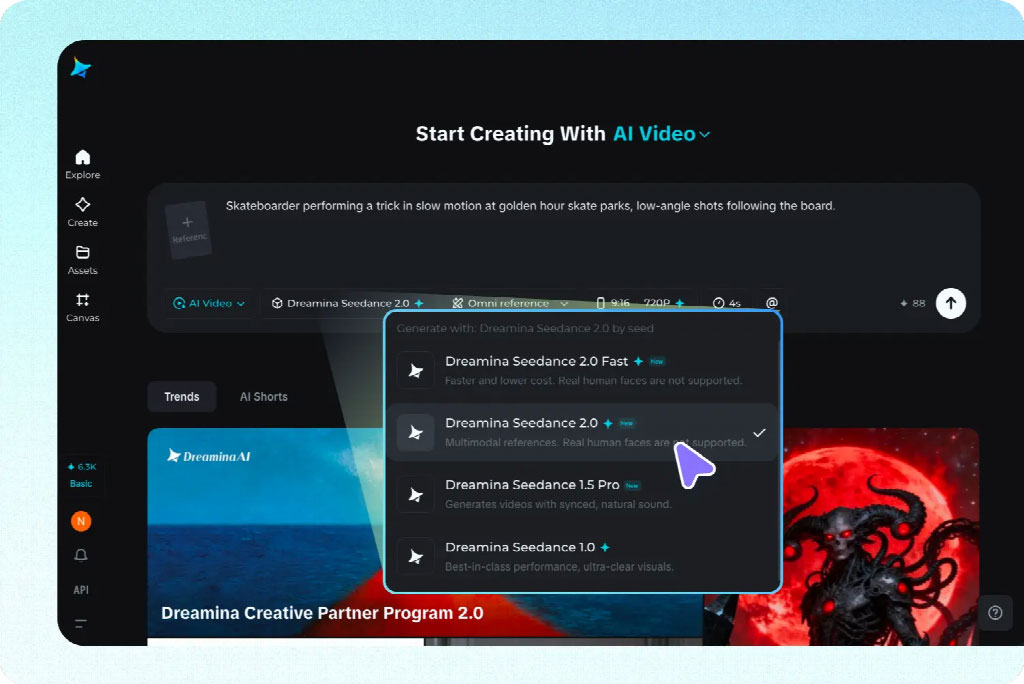
A useful video prompt tells the model what the viewer should see over time. Start with the subject, action and setting; then add the camera, lighting and mood where they help.
A vague request such as “a cinematic coffee video” could produce many scenes. A more useful brief is: “A barista gently places a ceramic cup of coffee on a wooden café table beside a window. Medium close-up, steady camera, soft morning light, natural editorial style.”
For the opening shot, try: “A quiet café table beside a large window in the morning. A ceramic cup and an open notebook rest on the wooden surface. Soft natural light, warm colours and a calm editorial mood. Wide composition, gentle camera movement, no text or logos.”
For the detail shot, try: “Use the supplied authorised photograph as the visual reference. A small amount of steam rises from the coffee while the cup and table remain still. Soft window light, close-up, steady camera and subtle natural movement.”
The prompts are creative directions, not guarantees. Review the generated result against the shot’s purpose. If a hand covers the cup throughout the action, or the steam becomes the main subject, adjust the instruction that caused the problem.
The barista placing the cup is subject movement. A camera moving closer to the cup is camera movement. If both are described vaguely, the output may become busier than intended.
When the action itself matters, start with a stable viewpoint: “The barista places the cup on the table; the camera remains steady.” This lets the viewer focus on the hand and cup.
For a calmer closing shot, keep the objects still and describe the camera: “The cup rests beside the window while the camera slowly moves closer.” Alternatively, keep the camera fixed and animate only the steam or curtain.
If both must move, describe the relationship in simple terms and watch the complete result. A prompt can suggest that the camera moves after the hand withdraws, but the model may not follow the timing exactly. If the action becomes unclear, split it into two shots and control the order in the edit.
Before generating final clips, check which aspect ratios, durations and output options are available in the selected workflow. The options may differ by model, account or tool, and the destination’s requirements can change.
For a vertical social post, plan a tall composition with enough space around the cup and the barista’s hand. If the café later needs a wide website version, you may need a separately composed shot rather than a narrow crop of the vertical version.
Leave quiet space for any headline, but do not assume the generated video will reproduce lettering correctly. Add the café name, offer or call to action in an editor and proofread it separately.
Preview the final placement where possible. Platform controls and captions can cover a composition that looked clear in the editor. Check the first frame, the main action and the final frame on a phone as well as on your working screen.
When several clips belong in the same video, a few shared details help them feel connected. Record the cup colour, table material, lighting direction and overall mood. If a person recurs, note their clothing and appearance too.
For the café sequence, the opening and detail shots might share a cream cup, wooden table and warm window light. The action shot can use a different camera angle while retaining those elements.
If the workflow accepts an authorised image reference, use the same approved source where appropriate. Compare the clips side by side: a cup handle can switch sides, a label can change or a window may move between shots. A reference guides the model; it does not lock every detail.
When a draft is not working, identify the problem before making another version. Is the action unclear, the camera too active, the subject too small or the product inconsistent?
If the camera rotates unexpectedly, simplify the instruction to “steady camera, medium close-up.” If the barista performs too many actions, keep only “places the cup on the table.” If the cup leaves the frame, ask for more space around it and specify where it should come to rest.
Change one or two instructions at a time. Keep the setting and light stable while testing a different camera direction, so you can see what actually improved. Save the prompt and reference for the version you prefer.
If a difficult movement remains unreliable, revise the shot design rather than generating indefinitely. A close-up of a cup already resting on the table, a real hand shot or a cut between two simpler clips can communicate the same idea more clearly.
Once you have usable shots, place them in the planned order. For the café video, begin with the wider table view, move to the cup being placed down and end on the detail of steam rising.
Watch the rough sequence before adding music. Does the opening establish the setting? Is the action visible? Does the final shot provide a natural pause? If the cup changes noticeably between clips, try a different take or use a transition that does not imply the objects are identical.
Adjust each shot’s duration to its role. An establishing view needs enough time to be recognised; a close-up needs enough time for the viewer to notice the detail. A clean cut is often sufficient. Use more elaborate transitions only when they support the mood or help explain a change.
The final edit can combine generated visuals with real photographs, voiceover, captions or music. A short headline can introduce the café’s mood, while the accompanying caption can provide practical information such as location or opening details if they are current and verified.
Use sound to support the scene: quiet room ambience, the sound of a cup on a table or music licensed for the intended use. If the video includes narration, add accurate captions and check that they remain visible long enough to read.
Watch the video without sound too. The main idea should still be clear through the sequence and any on-screen text. Keep text away from the subject and from areas likely to be covered by platform controls.
Show the draft to someone who has not seen the brief. Ask what the video is about, which moment they remember and whether any visual detail felt confusing. Their response can reveal a problem that was easy to miss while editing.
Then review the complete export for shifting hands, changing objects, unreadable text, abrupt cuts and inconsistent lighting. Compare any real product or location with approved source material. Make it clear where appropriate that an imagined scene is illustrative rather than footage of an actual event.


Discover our other works at the following sites:
Danetsoft is a global web agency headquartered in Indonesia, specializing in web development, managed hosting, and web publishing platform.


 [email protected]
 Magelang, Central Java
© 2026 Danetsoft. Powered by HTMLy